
Showing posts with label Gifts under $5. Show all posts

Sunday, April 4, 2010

Stamptacular Sunday Challenge: Sugar and Spice and Everything NICE!

This week on the Stamptacular Sunday Challenge our challenge is to create a card or project that is just for girls! how you do this is totally up to you! The possibilities are endless!
SPONSOR: Fresh Brewed
PRIZE: $10 Gift Certificate
AND
SPONSOR: Bee Crafty
PRIZE: 3 digital images of winner's choice

Now when I heard of this challenge I KNEW exactly what a I wanted to do...what girl wouldn't love a little chocolate in a purse? My bff is a purse consieur and would love a little purse with some chocolate in it (be sure to check out my next post below to see how easy these are to make!) Wouldn't this be a great way to say thanks to a co-worker or a fun party favor? These truly went together quickly! Thanks for joining me today, tutorial is below (one for the purse, one for the roses), I can't wait to see what girly thing you come up with!

Recipe:
  • Stamp: Bee Crafty, Paper Trey Ink
  • Die: Nestabilities Labels 4
  • Ink: Stampin' Up (and computer print out)
  • Other: Copics, Adhesive, Pins, homemade roses, glitter, Martha Stewart Leaf punch, Ribbon, Ghiradelli Chocolate and Glitter

Thursday, March 4, 2010

Stamptacular Sunday Challenge: You, Me and Baby Makes Three!

This week on the Stamptacular Sunday Challenge our challenge was to make a Baby card or gift. This weeks prize is fab... are you ready? This ADORABLE Magnolia stamp by Magnolia Down UnderWith the weather FINALLY getting warmer, I'm in the mood for SPRING! So I decided to make a baby wash cloth bouquet! I even MADE my own container! (I'll put up a tutorial for this very soon!). I couldn't resist making these adorable baby wash cloth roses and adding some glittery butterflies. The butterflies are attached to small bits of wire with glue dots, so I can form them to my liking within the flowers. My container was made with a large cardstock circle and a strip of cardstock that I had embossed (gosh, haven't done THAT in ages!). I then took my cardstock strip, scored a 1/2" on the long side, folded it, then cut slits to the fold. I then eased it around my circle...easy peasy! Thanks for looking, I can't wait to see what you come up with!

This also fits Cupcake Crafts Challenge: Flowers

Recipe:
  • Stamps: Butterflies by Martha Stewart, Fancy Flourishes by Paper Trey Ink
  • Ink: Memento, Stampendous Embossing Ink and Powder
  • Other: Baby Washclothes, rubber bands, silk flowers, glitter, Xyron, rhinestones, wire, glue dots

Sunday, November 1, 2009

Stamptacular Sunday Challenge #31: Friends

This week on the Stamptacular Sunday Challenge our challenge is FRIENDS with a twist...make your own DP!

Our sponsor this week is our own Liza with this adorable Cuttlebug Embossing Folder, just in time for our winter holidays AND Doodlestreet with a Digital Image of the winners choice!


I decided for this challenge I would make a gift for a friend...a notepad cover. You can get the template I used HERE.

I made the dp I used for the butterflies...I then punched them out and GLITTERED them. I placed them on the dp I made with the swirls that I had layered and stitched!

I finished my project with a punched sentiment and organza ribbon.

I then stamped a flourish and my sentiment on the inside. This was an easy, quick and inexpensive project and I can see that these would make nice holiday gifts!

Recipe:
  • Stamps: Papertrey Ink Fancy Flourishes and Texts Background. Studio G Sentiment
  • Ink: Tim Holtz Antique Photo
  • Template: Nichole Heady
  • Paper: dp by Imagenisce, Studio GSC
  • Punches: Martha Stewart
  • Other: Organza Ribbon, Glitter, Stitching

Tuesday, July 7, 2009

Digital Tuesday Challenge #14: Sweet Birthdays

This week on the Digital Tuesday Challenge I'm the hostess...and my challenge this week is SWEET BIRTHDAYS! The stipulation is to use at least one digital image and create something sweet with birthday's in mind, it could be a cupcake card or it could be a candy bar wrapper decorated in a birthday theme, let your imagination go WILD!

I decided I would do a cute lollipop birthday bouquet, this is a really simple and quick project with sooooo many possibilities! I decided on Have a Sweet Birthday for my theme and used Tootsie Pops (tropical flavored I think) for my lollipops (really I just loved the colors...pink and purple!). I purchased my flower pot at Hobby Lobby on sale for $1.50, put some florists foam in (I had on hand) and then started sticking my lolli's in it. I then added some curling ribbon and my topper and a little ribbon for a finishing touch...
This has so many sentiment possibilities:

  • How about for a teacher so she can "share" her bouquet with her students?
  • Great for a major birthday... you could put a topper in it that says 50 (or whatever age) SUCKS!
  • Also great for co-workers...inexpensive (mine is under $5, even with two bags of lollipops) and pretty to boot!
Thanks for joining me today and be sure to join in the Sweet Birthday fun...this weeks sponsor is MY GRAPHICO and they are giving away an entire digi stamp set to the lucky winner, so be sure to enter, I can't WAIT to see what you come up with!

Recipe:

  • Stamp: Digi Stamp by CC Designs Penguin
  • Dies: Nestabilities Circle and Scalloped Circle
  • Other: Lollipops, flower pot, florist foam, curling ribbon, Copics, Skewer (for topper) and ribbon

Thursday, May 28, 2009

Dustin Pike RELEASE Day!

Dustin's been busy drawing away and he has been gearing stuff up towards the summer...did you go to his blog yesterday and grab the freebie? PERFECT for those graduation cards!

Anyway, since summer is on everyone's mind and Father's Day will be here before we know it, I decided to use Dustin's BBQ set and make a little gift for the BBQ'r in my life! I thought these seasonings for the grill would make a great little boxed gift!
I took and rearranged the images in my Paint Shop Pro to create my border and bbq emblem, then printed and colored them with my Copics and then decorated my box with them...this was a super easy project and I hope you enjoy... keep scrolling down, I'm not done quite yet! :D


Recipe:
  • Stamps: Dustin Pike BBQ Supplies
  • Other: Nestabilities Circle, Pinking, Copics
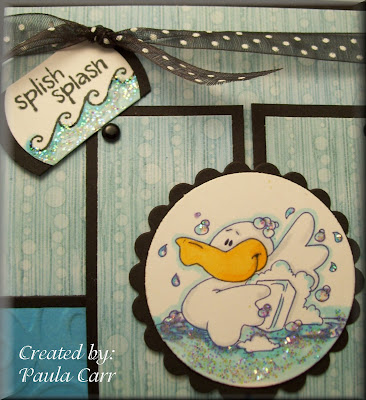
Rubber Ducky you're the one..... that's what this cute little duck reminds me of when I see him...Burt and Earnie singing in the bath tub...now I bet we'll all carry this tune in our heads the rest of the day! LOL... He's yet another new release from Dustin Pike, and I thought he was completely irresitable! I got the sketch from this week's Mojo Monday. I embossed part of the background and then layered my duck on top, who was colored in with Copics and then Stickled (gotta have some bling!) I stamped my sentiment (which is actually 2 separate Studio G stamps) and added that under my ribbon...this is really a simple card, that was quick to come together....thanks for joining me today and be sure to pop by Dustin's Blog, to see what the rest of the DT came up with...such cuteness, to grab the freebie and to enter the contest to win some of Dustin's great images!

Recipe:

  • Stamps: Dustin Pike, Studio G
  • Paper: Debbie Mum
  • Other: Cuttlebug Embossing Folder Swirls, Nestabilities Circle and Scalloped Circle, Brads, Ribbon, Stickles

Saturday, December 13, 2008

Thrifty Christmas: Gifts Under $5, Notecard Set

Been looking for a semi-last minute gift? Something a little personal? Me too! Actually I've had this notecard set in my head for quite awhile, but needed to get it done for an upcoming gift exchange with a music teacher. So instead of doing a "monogrammed" set, and knowing that she sends home lots of little notes, I decided to go with the music theme and create a quick, but cute, notecard set for her.

I used my Just Rite stamper to create the ring (A Small Note) around the music note, then using my nestabilities circle, cut it out and embossed it. I also used my Allegro embossing folder from Cuttlebug to use as a background for this set. It was quick and it was easy!

Then I needed a clever way to package 8 notecards and envelopes and remembered Lauren Meader came out with a cute little box with Timeless Templates (from paper trey ink, link here http://laurenm.blogs.splitcoaststampers.com/2008/12/11/template-time/) EXCEPT it's release date is the 15th...now KNOWING I don't have TIME to wait on the template, I made my own...I shoulda waited and just bought the template! This is the 4th or 5th version of trial and error and it came out...ok, not great, I'm not super pleased with the fit...it's a little loose, but it'll do.... so save yourself some aggrevation and go purchase her template if you like this box...trust me, it's worth every darn penny!

Recipe:

  • Stamp: Just Rite (for a small note), Music Note (unknown)
  • Embossing: Nesabilities (circle), Allegro by Cuttlebug
  • Ink: Tim Holtz
  • Paper: All from Joann's
  • Other: Organza Ribbon, Button, Flower (from silk flower bush)

Saturday, December 6, 2008

Thrifty Christmas: Gifts Under $5, Winter Towel Set

Have you taken a trip through your local crafty nook lately? I just love going in there! Ours is called Treasured Dreams, they always come up with whimiscal ways to present decorations, gifts and what-nots...and I always walk away with something I couldn't live without. However, sometimes their what-nots are a touch overpriced (for me), when I KNOW I can make them for so much less! Kitchen towels included! I've seen similar kitchen towels to the ones I made below for about $12 A PIECE! OUCH! The ones below cost me $1.50 each total.
The towel itself was $1 (found at my Dollar Tree, but I also found some outstanding towels at Wal-Mart for the same price) and the snowman fabric was $7/yard and I used a 3 1/2" X 14" strip for each towel, and the lace I had on hand.
These were easy to make and the longest part of the whole project was ironing my seams down and pinning the lace under the fabric. The sewing was the easiest part of all, STRAIGHT LINES! Can't go too wrong with that!
I plan on giving several friends and family members these little towel sets, I know most of their kitchen colors (and can match towel colors accordingly)and Prim (primitive decor) is in, in my area, so I know they'll be appreciated!


Above I wanted to show you what the towel looked like BEFORE it's transformation!

Thursday, December 4, 2008

Thrifty Christmas: Gifts Under $5, Fuzzy Socks, Acetate Box

My dh got me a pair of these warm and fuzzy socks for my b-day, and I loved them so much I thought they would make a great Christmas gift! But how to wrap something as boring (but cute -n- fuzzy) as socks? How 'bout an acetate box? While they may SEE the gift, they'll still have to guess just a little...could it be socks, a scarf, mittens? Since this has a "handle" you can also hang it on the tree. Here's the tutorial for this cute acetate box : http://www.splitcoaststampers.com/forums/showthread.php?t=374478&highlight=acetate+box+tutorial

I changed the directions slightly to fit my socks and made it 8" tall...

Recipe:
  • Paper: Transparency (for acetate), cardstock from stash
  • Stamp: Magnolia
  • Punch: Marthat Stewart Lace
  • Die: Nestabilities
  • Other: Colored Pencils, Double Stick Tape, Hole Punch, Ribbon

Wednesday, December 3, 2008

Thrifty Christmas: Gifts Under $5, Post It Note Holder

Whether you have a co-worker or just like using post it notes at home (I know they come in handy for me!), a quick and inexpensive gift is a post it note holder. I used acrylic frames I found at Dollar Tree, Post It Notes that I purchased in bulk and the rest of my stash to make these two little gems.
Recipe:
  • Punch: Martha Stewart Lace
  • Paper Piecing: This little girl I made almost 7 years ago, so I'm sorry I don't have the original, however I believe she is inspired by Mary Engelbreit.
  • Paper and Ribbon from my stash.

Recipe:
  • Paper: K & Co
  • Die: Cricut Opposites Attract
  • Pin: Stash that I made
  • Ribbon: Again, stash...

Wednesday, November 26, 2008

Thrifty Christmas: Personalized Crayons, Gifts under $5

Ok, I must go off to work...and with that I have no internet access (bah hum bug!)...and won't return until Monday...so my Thrifty Christmas daily postings will be on hold until then...I know, I know, I can pre-post and I have in the past, but this time I've been busy with some company, busy packing and well...just busy! BUT, before I go, I've been doing a little "blurfing" (blog surfing) and Lauren Meader came up with the CUTEST idea for personalizing crayons and a carrier (one of her timeless templates...the stocking below was using one of her timeless templates). So if you are looking for a cute idea for a child, but don't want to spend a lot of $$$$ check out her link here ( http://laurenm.blogs.splitcoaststampers.com/2008/11/25/a-little-gift-for-cassie/ )
And hey, have a great Thanksgiving...I'm gonna be working, BUT I'll still have some turkey and all the fixings...yummmm!!!!!! and I'll be back on Monday...and for those that are wondering WHAT I'll be working on... we'll be at a horse show, the show starts on Friday, but we go a few days early to prep the horses and well, just move in...that's a production in and of itself!

Sunday, November 23, 2008

Thrifty Christmas; Gifts Under $5, Snowman Pin

This adorable little snowman pin was made using materials I already had on hand. So easy to make, so quick to do. These would be super simple to do in mass quantity! You could also change the snowman's personality with your ribbon scarf...and also to match the recipients personality!


Supplies Needed:
  • Sticky Pin Back
  • 2 White, 2 hole buttons in different sizes
  • 4 seed beeds or rhinestones (I used rhinestones for my example...what I had on hand)
  • Ribbon
  • All purpose Glue
  • Scissors
  • Toothpick
    Step One: Remove paper from sticky pin backing
Step Two: Apply buttons with the smaller button's holes going horizontally, and the large button's holes going vertically

Step Three: Squeeze glue onto a scrap piece of paper, and using your toothpick place a dab of glue over each button hole and place your rhinestones/seed beads.

Step Four: Fold your ribbon in half.
Step Five: Place ribbon behind pin back, around the neck area as shown above. Now pull the ends through the loop.
Step Six: Trim the end of the ribbon scarf with your scissors. Place a little glue on the side of the snowman body and glue the scarf ends down. Let dry!

Thursday, November 20, 2008

Thrifty Christmas; Kids Crafts, Gifts Under $5, Paper Clip Bookmarks

Here's a SUPER QUICK craft that even the kids can do...paper clip book marks. Take a Jumbo Paper clip (found mine at Wal-Mart), and put a matching sticker on the front and back and tie off a little ribbon. So quick, so easy, so cute!
Supplies:
  • Jumbo Paperclips
  • Stickers: Flower by Martha Stewart, Heart by Miss Elizabeths
  • Ribbon: Various

Wednesday, November 19, 2008

Thrifty Christmas; Gifts Under $5, The Birthday Book

Here's a simple, but thoughtful gift, the birthday book, it holds everyones birthdays in it...and the beauty...it's only 3" X 3", so it fits perfectly in a purse!

I purchased inexpensive spiral bound albums (found at Wal-Mart last year) and using my scrap paper, I made several of these up! I used my word processing program to make the dates and lines for each page. These were super simple to make and well received!


Monday, November 17, 2008

Thrifty Christmas: Gifts Under $5, Birthday Calendar

Ok, Ok, I KNOW, calendar = boring....EXCEPT this calendar has all the birthdays ALREADY IN IT! This is my most requested gift in my family (and trust me on this one, I didn't do it ONE year and got my hind end chewed off...I ended up doing them ANYWAY!). So I purchase the $1 calendars, fill in the birthdays and put Mrs. Grossmans stickers to go with that month's theme (in this example April, Easter, so flowers, grass, bunnies, chicks and baskets) and a nice balloon or candle sticker on each date that has the birthday, along with the birthday recipients name. Now WHO wouldn't like a calendar already filled out for them at the beginning of the year?

Sunday, November 16, 2008

Thrifty Christmas: Gifts Under $5, Take Out Menu Binder

Here's my "go to" gift usually reserved for bridal showers, but would make a GREAT gift for those that have everything! Also makes a great gift for single people or super busy families! This is my personal Take Out Menu Binder and it gets used more often than I care to admit, however it's soooo handy having all my take out menus in one place! No more searching here or there to find the restaurants phone # or trying to figure out if that was the place that made the 5 lbs. of cheese pizza! LOL. All I have to do is flip to the correct tab and look through the page protector the menu is in...so easy! And easy and quick to make too!

Supplies Needed:
  • 1" Clear View 3 Ring Binder
  • 3 Hole Punch
  • Clear Page Protectors
  • Cardstock (12X12 and 8 1/2 X 11 Heavy cardstock)
  • Label Maker (or stamps)
  • Punch (for tabs)
  • Brads

Instructions:

  1. Start by measuring your front cover, this is going to be bigger than your standard 8 1/2 X 11 (they all vary slightly from manufacturer to manufacturer of your binder, so make sure you measure).
  2. Cut your cover (s) (remember to do something to the back also!) and decorate. In mine I used patterned paper, Mrs. Grossmans stickers, and my Cricut for the lettering.
  3. Now measure and cut your side strip. Slip it in the binder 1X to make sure it's the right size before decorating. Do NOT decorate this very lumpy, it's difficult at times to slide this one down because of the narrow opening! IF you have trouble sliding it in the narrow opening, use a thin ruler to help you.
  4. Now figure out your Tab labels for inside, I chose to go with; Pizza, American, Mexican and Chinese. 3-Hole punch 4 pieces of 8 1/2 X 11 cardstock (these are the dividers, so you want something sturdy!)
  5. Create your tabs and stagger them, make sure you again use heavy weight cardstock for the tabs as well as attach them with brads (I also ran my tabs through my xyron as well as attaching them with the brads), these will get a lot of use and you don't want them to fall apart on the recipient!
  6. Place in binder and put a few clear page protectors between each.

Saturday, November 15, 2008

Thrifty Christmas: Nail Polish Carton, Gifts Under $5, Teen/Tween Gift

I saw this nail polish carton on Diane's Blog here http://stampwithdiane.blogspot.com/2008/11/scrap-polish.html

It's perfect for those mini-nail polish bottles that are perfect stocking stuffers and teen/tween type of gifts! (Also great for Secret Santa stuff too!). After a little tweeking from Diane's original tutorial (not all nail bottles are the same height and width) I came up with this:
Here's a quick version of the tutorial (please note these measurements may have to be tweeked to fit YOUR nail polish bottle!):
  • Cardstock measures 5 1/2" X 1 1/4"
  • Score at: 3/8", 3/4", 2 3/8" 3 1/8", 4 3/4", 5 1/8"
  • Fold
  • Put glue dot or pop dot on bottom of bottle, and place bottle in carton
  • Punch 2 small holes in the top of carton and thread ribbon through and tie off
  • Add decoration to front and/or back.

Friday, November 14, 2008

Thrifty Christmas, Gifts Under $5, Journal & Pen

DH's aunt unexpectedly gave me a little journal with a pen, just cuz (don't you love little gifts like that?)...and I just LOVED it, it was spiral bound and I could make up my lists and she tied the pen on with some pretty ribbon...I felt special just having it, I mean it IS nicer than having your grocery list on the back of an old envelope! So,while shopping around, I found some nice Christmasy journals in the Michaels $1 section, and I prettied them up with the ribbon I had on hand.

I put the journal and pen in a Perfect Fit Box (here's the tutorial in case you missed it http://ponderingsofpaula.blogspot.com/2008/11/perfect-fit-box-tutorial.html )
I tied the box with some ribbon I had on hand and stuck a pretty pin in it, the idea and tutorial from Sharon Johnsons blog ( http://notimetostamp.blogs.splitcoaststampers.com/2008/11/13/pins-and-pretties/ ) Made up a quick litte tag and ta da! My little gift is ready to go!

Recipe:

  • Paper: My Stash
  • Stamps: $1 Michaels Section
  • Ink: Studio G
  • Dies: Nestabilities
  • Other: Bead Findings
  • Ribbon: On Hand

Wednesday, November 12, 2008

Thrifty Christmas: Free, yes FREE Nugget Wraps

Have you seen the adorable nugget boxes? These are a quick and easy gift for anyone on your list. Using Hersey's nuggets you can wrap them in patterened paper or stamp on computer address labels and wrap. Here's a link to free Christmas Nugget Wrappers (thanks to Jo-Anne J) just print and wrap! ( http://www.daisiecompany.com/store/index.php?main_page=product_info&products_id=3166 )
Note the picture above was taken directly from split coast stamps tutorial linked below.


Here's a tutorial on the nugget boxes ( http://www.splitcoaststampers.com/resources/nuggetbox.php )

Friday, November 7, 2008

Thrifty Christmas Tutorial: Mini Pizza Box, Gift Under $5 Manicure Kit

I saw this adorable Pizza Box and just had to recreate it, here is the original link at Jen Del Muro's blog http://iheart2stamp.com/2008/04/04/abc-friday-mini-pizza-box/
I just put to visual, what she wrote down.

I also found a small manicure set and sample nail polishes at a drug store on sale this week, so that's what's going in my box, this would be a great gift for a teenage girl, or a woman that works in an office, or great for someone that travels quite a bit!

Here's the recipe for my Decorated Box:
  • Stamp: Snowman by Rachelle Anne Miller
  • Ink: Stampology Onyx
  • Cardstock: Lavendar from my stash
  • Ribbon: Organza
  • Punch: Marthat Stewart Snowflake
  • Other: CB Snowflake Embossing Folder, Colored Pencils, Nestabilities Circles, Prisma Glitter, Stickles

Now onto the actual Tutorial!

Supplies Needed:
  • Cardstock 6" X 11"
  • Cutter with Scoring Blade/Scor Pal or Bone Folder
  • Scissors
  • Double Stick Tape
  • Embellishments of your choosing
Step 1: Score the short sides of the cardstock 1"

Step 2: Score the long side of the cardstock at 1", 5", 6" and 10"

Step 3: With scissors, cut tabs where scores meet as seen below

Step 4: Flip cardstock over, and put double stick tape on tabs

Step 5: Fold up box, attaching the flaps to the inside of the box

Here's what your box should look like. Here's what the manicure kit and nail polish look like in the box...good fit!